Tuesday, December 13, 2011

Red Velvet Cookies

Currently sitting on my desk at work - SIN!!

Is there any food that sounds more sinful than red velvet cake?  Red - the color of sin.  Velvet - such a  sensual fabric, it is sure to be sinful...  Cake - delicious, delicious sin.

Red velvet cake has been big in the south for many years, and lately, red velvet cupcakes have been driving the ridiculous cupcake obsession in America.  This, friends, is even better. 

Red. Velvet. Cookies.

How could red velvet cake have been improved?  By making it a cookie.  Cookies are the best.  Which is what I have done.  Make hundreds, eat them all, and wallow in sin.


Cookies:
  • 5 cups flour
  • 1/2 cup unsweetened cocoa powder
  • 2 ½ tsp. baking Soda
  • 1 ½ tsp. salt
  • 1 tsp. ground cinnamon
  • 2 cups unsalted butter, softened
  • 2 cups granulated sugar
  • 2/3 cup packed brown sugar
  • 4 eggs
  • 2 oz. bottle red food coloring
  • 2 tsp. vanilla
  • 1 tsp. lemon juice

  1. Combine flour, cocoa powder, baking soda, salt and cinnamon. Set aside.
  2. Beat butter until light and fluffy. Beat in sugars until smooth. Add eggs, food coloring, vanilla and lemon juice. Beat just until combined.
  3. Add flour mixture and beat just until combined.
  4. Place tablespoon-size balls of dough 2 inches apart on ungreased cookie sheets.
  5. Bake at 350 for 10 – 12 minutes. Edges will be set, but centers will still be soft. Cool on wire racks. Cooled cookies may be iced with cream cheese frosting.

Frosting:


  • 8 oz. cream cheese, softened
  • ½ cup butter
  • 2 tsp. vanilla
  • 5 – 6 cups confectioners sugar
  1. Cream butter and cream cheese together until light and fluffy.
  2. Add vanilla and confectioners sugar, 1 cup at a time, until frosting is slightly dry but still smooth.
  3. Frost cookies.

Crème de Menthe Brownies

Now, sometimes when we say "perennial favorite", what we really mean is "we've had these before, and I'm just overstating their importance to get you to like them." 

That is not the case with the crème de menthe brownies.

They are an ABSOLUTE NECESSITY at our Christmas party.  There is a good chance that there would be open revolt if they weren't there: candy canes carved into jailhouse shivs, sugar cookie throwing stars, pointsetta projectiles...  They. Are. That. Good.
 
For Brownies:
  • 1 cup sugar
  • ½ cup butter
  • 4 eggs
  • 1 ½ cups flour
  • ½ tsp. salt
  • 1 16oz can Hershey’s Chocolate Syrup
  • 1 tsp vanilla
  1. Preheat oven to 350°.
  2. Cream sugar and butter until light and fluffy.
  3. Add eggs, flour, salt, chocolate syrup and vanilla and mix well.
  4. Pour into a greased and floured 13x9x2 baking pan. Bake at 350° for 30 minutes. Cool in pan.
For Frosting:
  • 2 cups confectioner’s sugar
  • ¼ cup butter
  • 4 Tbs. Green Crème de Menthe
  1. Mix one cup sugar with butter and liqueur.
  2. Add up to one additional cup of sugar and beat until it is spreading consistency.
  3. Spread on cooled brownies.

For Glaze:
  • 1 cup semi-sweet chocolate chips
  • 6 Tbs. butter
  1. Melt together in microwave or double boiler.
  2. Cool a bit and spread on cake, covering it completely so that the green frosting is a special seasonal surprise.
  3. Cut into little squares and serve.

If your family and friends are anything like ours, these will go QUICKLY.  Make a whole bunch!!

Sweet Potato Souffle

So it seems that I owe you all two more recipes.  SO BE IT THEN!

First, we have a delicious side dish, perfect for your holiday buffet or intimate dinner.  Even better, you can fully assemble the dish, and refrigerate uncooked overnight, thus eliminating the need to bring out the mixer the day of the party!  Make-ahead and delicious?  Perfect.
 
  • 3 cups cooked, mashed sweet potatoes 
  • ½ cup sugar
  • 1/3 cup milk
  • 2 eggs
  • 1 tsp. vanilla
  • ½ cup butter, melted
Combine all with electric mixer. Put in 13 x 9 in. pan
Topping:
  • 1 cup light brown sugar
  • 1 cup chopped nuts
  • 1/3 cup flour
  • 1/3 cup melted butter
Sprinkle topping over sweet potato base.
Bake at 350 for 25 – 30 minutes

Sunday, December 11, 2011

Pea and Peanut Salad. Really.

OK people, for my second recipe today, I will post the EASIEST RECIPE I'VE EVER POSTED.  Four ingredients.  No cooking.  A moderately-well-trained gibbon could make this recipe.  And yet, it is routinely the most-requested recipe from my family's large Christmas party.  This baffles the whole family, but, I guess, sometimes simple is good!

Also, this recipe makes a whole lot of peas.  Make it for a group.  Or make sure you're reeeeally hungry!


  • 6lbs Frozen peas
  • 1 large red onion, chopped fine
  • 1 large jar of dry-roasted peanuts
  • Just enough Miracle Whip to get it to stay together 


  1. MIX TOGETHER IN A BOWL!  Really.  It is that easy.  You don't even have to thaw the peas.  Make sure to store in the fridge.

Peanut Butter Blossoms

Yes folks, I realize that I neglected to post yesterday.  I'm dealing with a fairly wicked cold at the moment, and it has me all messed up.  To make it up to you, I'll post twice today.  How does that sound?

First off, more cookies!  These are the ultimate kid cookie.  Unless that kid happens to have a peanut allergy, in which case he/she will enjoy these cookies immensely for around 25 seconds before going into anaphylaxis. 

Epipens at the ready?  OK, here we go!

  • 16 oz Hershey Kisses (96), unwrapped
  • 1 cup shortening
  • 1 ½ cups peanut butter
  • ⅔ cup packed light brown sugar
  • ⅔ cup granulated sugar
  • 2 eggs
  • 4 Tbs. milk
  • 2 tsp. vanilla extract
  • 3 cups all-purpose flour
  • 2 tsp. baking soda
  • 1 tsp. salt
  • Granulated sugar for rolling


  1. Preheat oven to 375°.
  2. Remove foil wrappers from Hershey Kisses (DO THIS BEFORE COOKIES GO IN THE OVEN).
  3. Beat shortening and peanut butter in large bowl until well blended.  Add ⅔ cup granulated sugar and brown sugar; beat until fluffy.  Add eggs, milk, and vanilla; beat well.
  4. Combine flour, baking soda, and salt.  Gradually mix into peanut butter mixture.
  5. Shape dough into 1-inch balls.  Roll in granulated sugar, place on ungreased cookie sheet.
  6. Bake 8-10 minutes or until lightly browned.  Immediately press one Hershey Kiss into the center of each cookie (cookie will crack around edges).  Remove from cookie sheet to wire rack and allow to cool completely.  Makes approx. 8 dozen.

Friday, December 9, 2011

Pecan Balls

Of course the first holiday recipe is going to be a Christmas cookie. Obviously.

These particular cookies look like little snowballs - double-coated in powdered sugar. This means, however, that they also make a mess when you eat them, so they are to be avoided when wearing black clothing, or else you'll look like a coke fiend instead of a cookie monster.

Now, on to the cookies!

  • ½ cup sifted confectioners sugar, plus additional for dusting
  • 1 cup soft butter
  • 2 tsp. vanilla
  • 2 cups sifted flour
  • 1/4 tsp. salt
  • 2 cups finely chopped pecans

  1. Cream sugar and butter thoroughly. Blend in remaining ingredients, making sure to blend well.
  2. Chill dough for a short time.
  3. Shape dough into balls, the size of large marbles. Place on greased cookie sheets and bake at 350 until just brown, about 15 minutes. Be careful not to overbake, or cookies will crumble.
  4. Remove from pan and immediately roll hot cookies in additional sifted confectioners sugar. When cookies have cooled, roll in sugar again. You will use about 2 cups of sugar for rolling.


'Tis the Season

Well folks, it is that time of year...  It is finally cold, and I FINALLY get to put up holiday recipies.  So, I herefor pledge to put up one holiday recipe a day until Christmas!!  Promise!!

Tuesday, August 9, 2011

Ooo hey!

Look! At some point, while I wasn't paying attention, I reached 3,000 hits. You all are awesome. Thank you!!!

Panko & Mustard Haddock - Quick and Easy (and Healthy)!

So folks, remember how I said I was going to post more often? Heh. About that... I swear, I'm not consciously shirking by responsiblogities... Life gets in the way sometimes.

Anyhoo, yesterday, after a long day at work, I was to swing by the grocery store on the way home and pick up some salmon for dinner. Evidently, and I feel like I should have known this, salmon isn't in season right now, because it was like $14/pound, even for the farm-raised, non-organic type. Thus, I surveyed my options - and it being 10 minutes before the fish counter closed for the night, I surveyed them quickly:

Snapper? meh
Cod? cheap, but obviously previously frozen and didn't look especially good
Tilapia? might as well eat paper. flavorless. funless.
Catfish? too fatty/oily/stanky
Haddock?

Hmm... Haddock... An easy-to-love, mild, white ocean fish, this haddock was line-caught in Iceland, which is listed as sustainably-fished on the Monterey Bay Aquarium Seafood Watch website (which I strongly encourage any seafood fans to check out)! And $5.99/lb? Perfect!

I purchased 4 fillets, grabbed some asparagus to roast as a side dish, and headed home. While at a red light, I called home and told the fam to find the broiler pan and turn the oven to 400 degrees. And then I cooked:

  • 4- 1/2lb haddock fillets
  • ~1/4 cup Dijon mustard
  • Salt, pepper, and garlic powder, to taste
  • 1 tsp rosemary leaves, chopped fine (fresh is best, dried is fine)
  • ~1/4 cup Panko bread crumbs
  • ~2 Tbs Grated Parmesan cheese
  • Non-stick spray
  1. Preheat oven to 400 degrees. Line the bottom of a broiler pan with tinfoil, and spray the top section with non-stick spray. NB: Whenever I bake fish, I prefer to do it on a broiler pan, so that the fish doesn't sit in liquid while it cooks.
  2. Pat the fish dry, and lay it skin-side-down on the broiler pan. Spread the mustard thinly over the fish. Season with salt, pepper, garlic powder, and rosemary.
  3. Sprinkle Panko and Parmesan on fish, until the fillets are just covered. The mustard should make it stick to the fish. Spray the Panko-covered fish lightly with non-stick spray.
  4. Cook at 400 degrees for 10-15 minutes, or until the Panko is lightly browned. Serve hot.

Tuesday, July 26, 2011

Corn Chowder Salad

Photo courtesy of foodandwine.com


Hello everyone! Yes, yes, I know, it has been a ridiculously long time since I've written. You've forgotten what I look like, and I can barely remember the sound of your chewing.

That was a little gross. My apologies.

So, I'm currently at the beach (be jealous), relaxing by the pool (more jealous), and I figured it was about time I got back on the blogging horse. (Coincidentally, there are wild horses here.)

Which brings me to today's recipe, which I made for the 11 of us at the house last night: Corn Chowder Salad.

Are you confused? Chowder salad?

Suffice it to say, this salad is everything you'd get in corn chowder, minus the liquid. Sweet corn, onions, potatoes, bacon, bell pepper... Delish! Now, I made some changes to how I made this dish: I par-boiled the cut potatoes, then sauteed them in the bacon fat to soak up all the juices.

By the by, I got this recipe from the most recent Food and Wine magazine, and it was submitted by Josh Kilmer-Purcell and Brent Ridge, the Beekman Boys!
  • 4 thick slices of bacon (4 ounces), cut crosswise 1/2 inch thick
  • 1 pound Yukon gold potatoes, peeled and cut into 1/2-inch dice
  • 2 red bell peppers, cut into 1/2-inch dice
  • 8 ears of corn, kernels removed
  • 1 medium red onion, thinly sliced
  • 1/4 cup cider vinegar
  • 1/4 teaspoon crushed red pepper
  • Salt

  1. In a large skillet, cook the bacon over moderately low heat, stirring a few times, until it is crisp, about 5 minutes. Using a slotted spoon, transfer the bacon to paper towels and let drain.
  2. Pour off all but 3 tablespoons of the bacon fat in the skillet. Add the potatoes and cook over moderate heat until they start to brown, about 3 minutes. Stir and cook for about 2 minutes longer, until almost tender. Add the diced red peppers and cook, stirring occasionally, until the potatoes and peppers are tender, about 5 minutes. Add the corn kernels and cook, stirring, until heated through, about 3 minutes.
  3. Transfer the vegetables to a large bowl and stir in the onion, cider vinegar, crushed red pepper and bacon. Season the salad with salt and serve.

Thursday, May 19, 2011

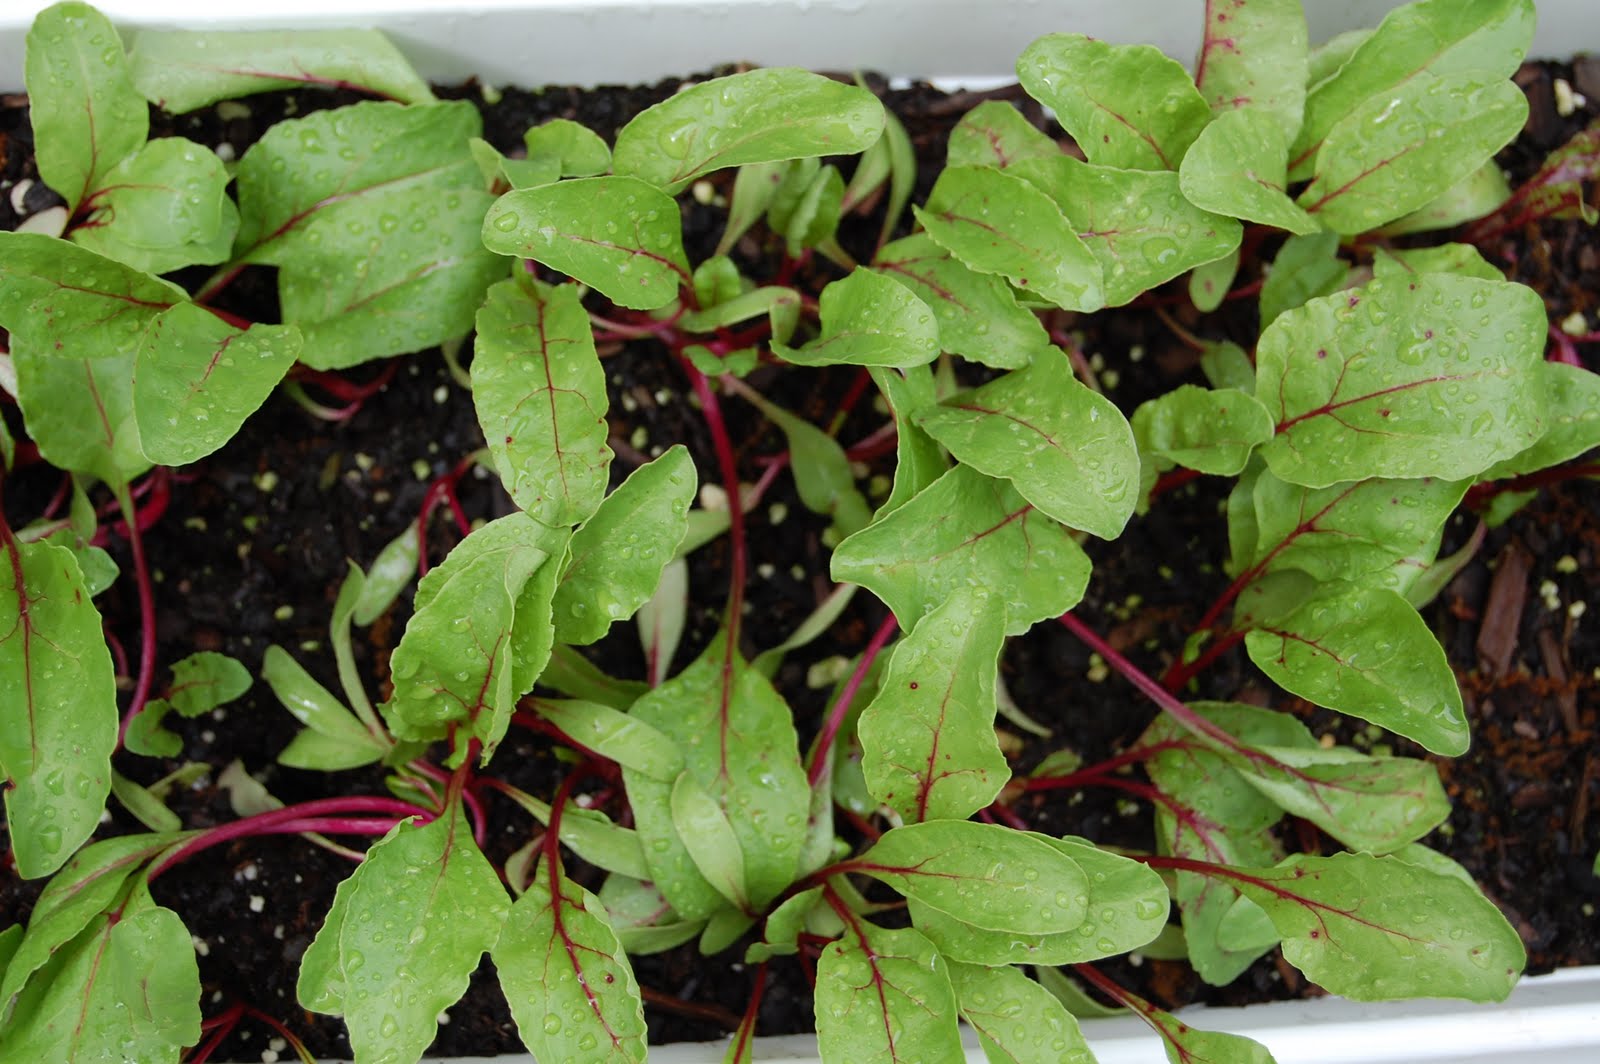
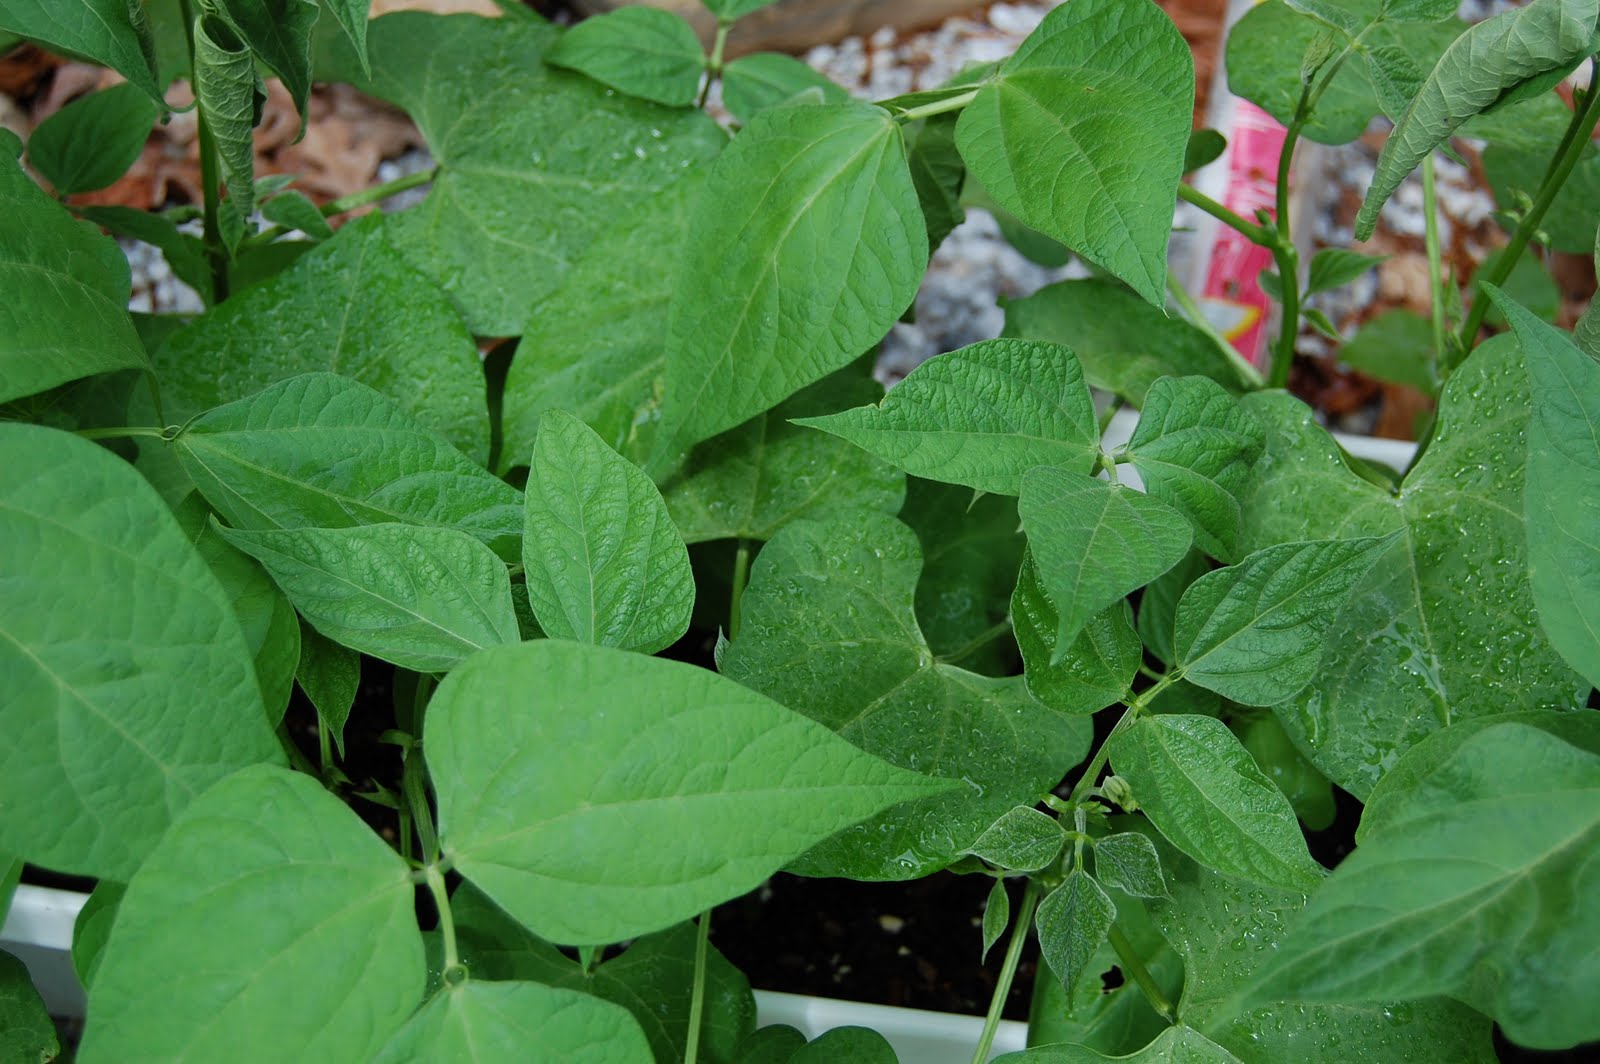
Some photos of what I'm growing this year...

Hello lovely readers!

I though that, since I haven't had the opportunity to do much cooking of late, I'd share some photos of what I'm growing this year.

Due to a lack of weekend time, my best-laid plans to construct raised 8'x4' vegetable beds went out the window in early April, and was replaced by a scaled-down container garden. I'm growing four types of tomatoes (all determinate varieties, which stay compact), zucchini, summer yellow squash, bush beans, snow peas, celery, beets, yellow onions, pickling cucumbers, arugula, and mesclun, along with basil, rosemary, parsley, sage, and two types of thyme (German and variegated lemon).

My family keeps asking how my "crop" is doing, so I asked my lovely younger sister (home from college for the summer) to use her prodigious photography skills and take some pictures! All photos in this post are (c) 2011 Kerry Flanagan.

The first tomatoes of the year


Sweet Basil (looks like some critter has been munching on this...)


Beets... Just greens now, soon to be tasty red morsels of yummyness.


Bush Beans - can't wait for fresh-picked green beans!

More to come soon!

Tuesday, May 10, 2011

Congratulations are in Order...


I would like to extend my congratulations to the newest James Beard Award-winning chef, Jose Andres. Chef Andres' flagship restaurant, Jaleo, is a DC institution, and is credited with starting the tapas movement. The food at Jaleo is outstandingly good (as are the libations; the Hendricks tonic I had there last year was mind-blowingly delicious and inventive), and Chef Andres deserves every award he can be given. Bravo!

Friday, April 22, 2011

Carrot, Parsnip, and Golden Beet Puree


I know it isn't the best photo... but it is damn tasty...


So readers, I know that in my last post, I expressed some, shall we say, dissatisfaction with root vegetables. After a long, cold winter chock-a-block with roasted root this and baked root that, you just want something fresh and light.

Well then, step right up, because this root veggie puree is as fresh and light as they come. And it couldn't possibly be any easier, thanks to the magical cooking powers of steam.

  • 2 lbs carrots, peeled and chopped
  • 1 lb parnips, peeled and chopped
  • 1 lb golden beets, cleaned, peeled, and chopped
  • 1 tsp salt
  • 1 1/2 cups water
  • 1 cup vegetable broth
  • 2 Tbsp butter (optional)
  1. In your favorite pot, fitted with your favorite steaming attachment, bring water, broth, and salt to a boil.
  2. Add vegetables to steamer and cover. Steam until tender, 15-30 minutes, depending on the thickness of your veggies. Check liquid level periodically; if running low, add more water.
  3. Once tender, pour veggies into a mixing bowl. Using a potato masher, pastry cutter, or other such implement, mash vegetables together. Pour in small amounts of steaming liquid to help puree come together (this will also add flavor and salt). If desired, mash in butter for a silkier texture. Serve hot.

Thursday, April 21, 2011

Carrot Cake Cupcakes with Cream Cheese Frosting


Yes, I decorated them with little carrots. Yes, I'm a total tool. I embrace it.


Allow me to brag about my mother for a second:

My mother is an amazing cook. Imaginative, inspired, and passionate. While there isn't anything at which she is bad, cooking-wise, she truly excels at baking. From a very young age, my siblings and I would watch as she painstakingly decorated gorgeous from-scratch cakes for our birthdays, and every December, from Thanksgiving to Christmas, the house is filled with the smell of baking cookies, dozens of kinds, and dozens of each kind.

"So?" (you may say to your not-so-nostalgic self) "Plenty of people can bake."

This, readers, is true. Anyone can bake, really. Basic baking is just chemistry and following directions. But it takes a gift to elevate it to an art form.

There are two things that my mother makes better than anyone else on the planet. Trust me on this one. I've done my research. I've ordered these things at innumerable restaurants, and each time they pale in comparison. Many good meals have been ruined by sub-par desserts.

They are, in no particular order:

Carrot Cake

and

Key Lime Pie

The key lime pie recipe may make its way onto this website in the future... only time will tell. Today, I will provide a version of her recipe (I'm being selfish and keeping the true original for myself) that has been adapted for cupcakes.

For cupcakes:
  • 2 cups sugar
  • 2 cups cake flour
  • 1 ½ tsp cinnamon
  • 1 tsp salt
  • 1 tsp baking soda
  • 1 ½ cups vegetable oil
  • 4 eggs
  • 3 cups grated carrots

  1. Preheat oven to 350 degrees. Place paper cupcake holders into the cups of cupcake tins.
  2. Sift together dry ingredients.
  3. In separate bowl, mix oil with beaten eggs.
  4. Add small amount of dry to wet, beating well after each addition, until combined.
  5. Fold in grated carrots until combined.
  6. Fill each cupcake holder approx 2/3 full with batter. Bake for 15-18 minutes, or until a toothpick stuck in the middle comes out cleanly. Remove from tins and allow to cool completely on cooling rack before icing. Makes approx. 2 dozen cupcakes.

For frosting:

  • 1 stick (1/2 cup) butter, room temperature
  • 2 8oz packages cream cheese, softened
  • 2 tsp vanilla
  • 1 lb powdered sugar

  1. Cream butter and cream cheese in stand mixer. Add vanilla.
  2. Add sugar in small amounts, beating well after each addition.
  3. Pipe or spread on to cooled cupcakes.
  4. Devour.

The Government Didn't Shut Down...

...but my motivation did! Sorry folks!

I'm sure you all know the feeling I've been having these past couple of weeks... You get home after a long day at work, having run a number of errands on the way home, and the last thing you want to do is dream up what to cook that evening. Times like these are why frozen pizza is a multi-billion-dollar industry!

(For the record, I find the best frozen pizza to be Freschetta Rising Crust cheese pizza.)

This day-in, day-out tedium of eating to survive (not to enjoy) is a rut we all fall in to at some point. I'm sure even Ina Garten (love her) orders Chinese delivery every now and again. However, there will always be something to break us out of our food shell.

For me, this week, that something is the upcoming Easter holiday. For you, it may have been Passover. Or the weather getting warm enough to grill again. Perhaps you saw some amazing looking artisanal cheese when your local farmer's market started back up. What ever it is, run with it! Spring is a time of delicious ingredients, a time for the return of fresh fruits and vegetables to the table. Let the food inspire you!

Like I said above, the coming Easter holiday has knocked me back in to food mode. Unlike many years, when I travel to see extended family, this year they are coming to me! Obviously, I've been fantasizing about this meal since January.

Over the next couple days, I'll be posting recipes that I will be making, or those that came in a close second to the final choices. I hope you all enjoy them!

Thursday, April 7, 2011

Shut down, Eat Up! Italian Fritatta

OK folks. So, this first shutdown recipe costs $17.60 at my local Harris Teeter, and that is before I use my store discount card. It is also super-duper easy, and good for breakfast, lunch, or dinner!

Think of a fritatta as a quiche without a crust. Puffy, cheesy, and delicious. here we go!

  • ~10oz thick cut bacon ($5.49 for 20oz package)
  • 8 eggs ($2.99/dozen)
  • 1 pint light cream ($2.89)
  • 3 Tbs tomato paste with garlic and oregano ($0.89 for 6oz can)
  • ~6oz shredded mozzarella cheese ($2.69 for 8oz package)
  • ~1/2 bag frozen Italian vegetable medley ($2.65 for 12oz bag)
Not included in price (aka pantry staples):
  • 2 tsp Garlic powder
  • 1 tsp salt
  • 2 tsp black pepper
  • Nonstick cooking spray

  1. Preheat oven to 375 degrees.
  2. Cut bacon into lardons (for what a lardon is, click here). Spray oven-safe saute pan with nonstick spray and heat over medium flame. Add bacon and cook until crispy and fat is rendered. Remove bacon with slotted spoon, leaving fat in the pan.
  3. Add vegetables to pan and saute in bacon fat until starting to brown.
  4. Meanwhile, crack eggs and combine with cream in bowl. Add tomato paste, garlic powder, salt, and pepper. Whisk thoroughly to blend.
  5. When vegetables are ready, reduce pan to low. Spread the vegetables evenly in the pan. Pour in ~1/2 of the egg mixture. Sprinkle all bacon and 1/2 cheese on top and let cook for ~1 minute to set the eggs slightly, then pour on the rest of the egg mixture and top with remaining cheese.
  6. Turn off stove and place pan in oven for 10-15 minutes, or until your fritatta has gotten puffy and golden brown. Let cool slightly, slice like a pie, and serve.

Wednesday, April 6, 2011

So, about that bread line...


Aren't our bowler hats stylish?!

Well faithful readers, it looks like the US government is about to shut down until the crybabies (ahem, or one crybaby in particular) on Capitol Hill get their acts together and pass a continuing resolution for the budget for fiscal year 2011. Being a life-long DC-area resident and avid policy wonk, I know many, many Federal government workers who will be, in effect, furloughed (aka, vacay without pay).

Now, while one of my friends (a staffer for a House member from the Midwest, and who shall remain anonymous for fear of the guillotine), laughed heartily and said "LET THEM EAT CAKE", I'm thinking that many of these Federal employees are living a fairly meager existance in DC, the city with the third-highest cost of living in the country (behind Manhattan and San Francisco).

I feel for you, my friends. Having been, until recently, among the long-term unemployed, I understand the feeling of having a depleted savings and paying for groceries in spare change. Thus, I have decided to bring you some inexpensive edibles, all tasty, and all costing less than 20$ for 2 servings at DC supermarket prices.

Now, I will not be providing my recipe for my world-famous gruel (that's a joke, folks), but I will be exploring some great food staples that are also inexpensive (for example: eggs, chicken thighs, flank steak, and rice). And don't worry, I promise everything will be tasty!

N.B.: I will not include spices in the pricing of my meals, so if I use one you don't have around the kitchen, write me, and we'll work out another option!


Please sir, can I have some more?


PS: None of these recipes will involve tea in any way, shape, or form. I promise.

Monday, March 28, 2011

What do you want to see?


Hello dear readers!

So, I have a fairly light schedule at work this week before I head up to Poughkeepsie, NY this weekend to see my baby sister at college, so I'm hoping to throw down a couple good posts. What do you want to see on here (aside from more frequent posts)... Any requests?

Spring Piccolini with Broccoli Rabe, Asparagus, and Sweet Peas

A few nights ago, I had a fabulous dream.

I was grocery shopping (I know, how mundane, even in my dream life), and I was in the produce section. There, ahead of me, between the beet greens and the parsnips, was one lonely bunch of broccoli rabe (pronounced rahb). "How delicious", thought dream-Billy!

I reached out to grab it, and as my hand met the veg, so did another hand! I turn to my right, and standing there, holding the same bunch of veg as I, is my perfect man. Tall... dark hair... blue eyes... I melt. But not enough to let go of the broccoli rabe.

We laugh uncomfortably. I introduce myself; he replies that his name is Rob.

Naturally, I make an adorable joke about robbing Rob of his rabe. He laughs. I laugh. I invite him home for dinner... and we lived happily ever after. Or at least that's how I'm saying it ended.

Anyhoo... Back to the food.

Broccoli rabe, also known as rapini, is a delicious member of the Brassiceae family of veggies, who also bring us broccoli, cauliflower, cabbage, and turnips. It is grown year-round, which is why I turn to it now, in the early spring, when I am so effing sick of root vegetables that I want to scream at the next potato I see.

Broccoli rabe has a pleasing, nutty-yet-somewhat-bitter taste. The leaves, stems, and florets (like mini-broccoli) are good fer' eatin'.

Now, on to the recipe!

  • 1 1/2 lbs of dried piccolini pasta (if you cant find piccolini, ziti or penne will do)
  • 1 large bunch broccoli rabe (~1 lb)
  • 1 bunch asparagus spears
  • 1 large white onion
  • 2 cups frozen peas
  • 1 heaping Tbs chopped garlic
  • 1 cup heavy cream
  • 1 cup half and half
  • 1 1/2 cups chicken stock
  • 1/2 cup white wine
  • 3 Tbs butter
  • 1/4 cup olive oil
  • 1 cup + 1/2 cup grated Parmesan cheese
  • 1/2 cup Panko bread crumbs
  • 1/2 tsp ground nutmeg
  • Salt
  • Pepper
  1. Vegetable prep: Chop onion. Cut off woody bottoms of broccoli rabe and asparagus. Chop broccoli rabe into ~1-inch lengths, or roughly bite-sized pieces. If asparagus is thin, chop into 1-inch lengths; if it is thick, chop into 1/2-inch lengths.
  2. Preheat oven to 425 degrees.
  3. Place large, oven-safe saute or paella pan on the stove top. Add butter and oil and heat over medium heat. Once hot, saute onions until just soft, 2-3 minutes. Add broccoli rabe and asparagus and saute. Rabe will wilt and shrink. Add garlic. Saute over medium heat for 4-6 minutes, stirring occasionally, until the rabe leaves are wilted and other veggies are bright green.
  4. In separate pot, bring ~4 qts water to a boil. Add a liberal pinch of salt and pasta. Cook until slightly underdone, approximately 1 minute shy of package directions. Drain.
  5. To saute pan, add peas, wine, and chicken broth. Bring to a boil and let reduce for 2-3 minutes.
  6. Stir in cream and half and half. Bring to boil. Add nutmeg, salt, and pepper. Stir in 1 cup Parmesan cheese.
  7. Add pasta to saute pan and mix with vegetables until evenly incorporated. Sprinkle Panko and remaining cheese over top of pasta/veggie mixture.
  8. Place in preheated oven for 5-10 minutes, until the top is crusty and browned. Serve hot.

Thursday, March 17, 2011

Irish Soda Bread - My Great Grandmother's Recipe

Happy Saint Patrick's Day to all!

Now, avid readers, I know that I have been shirking my updating responsibilities, but my new job has been keeping me ridiculously busy (in a good way). I will do my best to be more blog-conscious!

Irish soda bread, or Irish bread, as my family calls it, has been our tradition since before I can remember. Every March, we make tons of it to give to friends and take in to work. I know it was a hit in my office this morning!

So, without further ado, here it is, my Irish great-grandmother's recipe!

  • 4 cups all purpose flour
  • ¼ cup sugar
  • 1 tsp. baking soda
  • 1 tsp. baking powder
  • 1 tsp. salt
  • 1 box raisins (~15oz)
  • 2 eggs
  • Buttermilk
  1. Preheat oven to 350 degrees.
  2. Mix all dry ingredients together by hand.
  3. Break 2 eggs into a 2-cup measure and beat with a fork. Add enough buttermilk to total 2 cups. Stir to incorporate eggs into liquid mixture.
  4. Pour wet into dry and mix all together by hand. Batter will be stiff.
  5. Put into a greased round heavy pan (use butter or cooking spray). I use old frying pans with the non-oven-safe handle removed.
  6. Bake at 350 for 1 hour. Cool on rack.